Get Crunchy, Gooey Panini Sans Press: Simple Skillet Method
There's nothing quite like biting into a perfectly crafted panini: a symphony of crunchy, golden-brown bread giving way to a warm, gooey, and often cheesy interior. It’s the kind of sandwich that elevates a simple meal into a delightful experience. For the longest time, many believed this cafe-worthy creation was exclusive to those who owned a dedicated panini press. But what if we told you that the secret to achieving that irresistible texture and flavor lies not in an expensive, countertop-crowding appliance, but in your very own kitchen skillet? You absolutely can make an
easy homemade panini without a panini press, and the results are just as fantastic.
Forget the notion that you need specialized equipment. This simple skillet method unlocks a world of delicious hot sandwiches, turning weeknight dinners or leisurely lunches into gourmet affairs. We're about to dive into how you can create that perfectly toasted, delightfully squished sandwich with minimal fuss, maximum flavor, and a surprising lack of cleanup compared to bulky appliances.
Why Ditch the Press? The Skillet Advantage
The allure of a panini press is undeniable – those crisp grill marks and the promise of a perfectly flattened sandwich. However, for many home cooks, it's an appliance that often sits idle, taking up valuable counter or cabinet space. This is where the skillet method shines, offering several compelling advantages:
*
No Extra Appliance Clutter: One less gadget to buy, store, and maintain. Your trusty cast-iron skillet (or even a good quality non-stick pan) is already a kitchen staple.
*
Cost-Effective: Save your money for premium ingredients, not another single-use appliance.
*
Surprisingly Quick: From assembly to plate, a skillet panini often takes just 10-15 minutes, making it an ideal choice for busy weeknights.
*
Effortless Cleanup: A single skillet is far easier to wipe down than a multi-surface electric press with all its nooks and crannies.
*
Delicious Results: While you might miss the iconic grill lines, the flavor and texture are indistinguishable. You still achieve that satisfyingly crunchy exterior and molten core, which, let's be honest, is what truly matters.
*
Versatility: Once you master the technique, your skillet becomes a gateway to endless hot sandwich creations, from simple grilled cheese upgrades to sophisticated gourmet combinations.
This method proves that convenience doesn't mean compromising on taste or quality. It’s about leveraging what you already have to create something truly delicious.
The Secret Weapon: Your Trusty Skillet and a Heavy Friend
The magic behind a press-free panini lies in mimicking the press's two key functions: applying even heat and consistent pressure. Your skillet handles the heat, and a heavy, heat-safe object provides the necessary downward force.
Choosing Your Skillet(s)
While various pans can work, the best choice for making an
easy homemade panini without a panini press is a:
*
Cast-Iron Skillet: This is the superstar of the panini world. Cast iron retains and distributes heat incredibly well, ensuring an even, golden crust. Its natural heft also contributes to better pressure. If you have two cast-iron skillets, particularly one slightly smaller than the other, you're perfectly set up for the "two-skillet" method.
*
Heavy-Bottomed Non-Stick Pan: If cast iron isn't an option, a good quality, heavy-bottomed non-stick pan can also work. Just ensure it's sturdy enough to handle the pressure without warping.
Selecting Your "Press" Weight
This is where you get creative with common kitchen items:
*
Another Skillet: As mentioned, a second, slightly smaller cast-iron skillet placed directly on top of your sandwich is ideal. Its weight, combined with its ability to get hot, helps cook both sides simultaneously and apply even pressure.
*
A Heavy Pot or Saucepan: A sturdy saucepan, especially one filled with water or canned goods, makes an excellent makeshift weight.
*
A Brick Wrapped in Foil: This is an old-school BBQ trick for perfectly pressed chicken, and it works wonders for panini too. Just make sure it's clean and tightly wrapped in heavy-duty aluminum foil.
*
A Flat Baking Sheet with Weight: Place a sturdy baking sheet over the sandwich, then top it with a can of tomatoes or a few heavy ceramic plates.
The goal is to find something heavy and heat-safe that can rest evenly on your sandwich, applying consistent downward pressure throughout the cooking process. For even more detailed instructions and troubleshooting, check out our guide on
Easy Homemade Panini Without a Press: Skillet Secrets Revealed.
Crafting Your Perfect Skillet Panini: A Step-by-Step Guide
Now that you understand the "why" and "what," let's get to the "how." This method ensures a delicious, satisfying hot sandwich every time.
1. Choose Your Bread Wisely
The foundation of any great panini is the bread. You need something sturdy enough to hold its shape under pressure but soft enough to compress and toast beautifully.
Good options include:
*
Ciabatta: A classic choice, offering a rustic texture and excellent chew.
*
French Bread or Baguette: Slice horizontally for long, satisfying sandwiches.
*
Thick-Sliced Sourdough: Its tangy flavor adds another dimension, and its robust crumb holds up well.
*
Focaccia: Offers a soft, airy interior with a flavorful crust.
*
Brioche Buns (for sweeter options): If you're venturing into dessert panini, brioche is fantastic.
Avoid overly soft or thin sandwich breads, which can become soggy or disintegrate under pressure.
2. Assemble Your Fillings
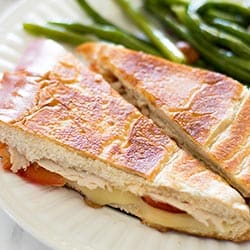
This is where you get to personalize your panini. A classic combination, as suggested by the experts, involves tangy garlic aioli, tender turkey, sliced tomatoes, and your favorite melty cheese.
Key considerations for fillings:
*
Melty Cheese is a Must: Provolone, mozzarella, Gruyère, cheddar, or even a good quality Monterey Jack will ensure that irresistible gooey center.
*
Don't Overfill: While tempting, too many fillings can make your panini difficult to press evenly and can result in uncooked centers or spillage. Aim for a moderate amount.
*
Thinly Slice Ingredients: This promotes even cooking and prevents the sandwich from bulging too much.
*
Consider Spreads: Beyond aioli, think pesto, olive tapenade, mustard, or a simple buttering of the outside of the bread.
3. The Skillet Method in Action (Two Ways)
Here’s how to make your
easy homemade panini without a panini press:
Method A: The Two-Skillet Press (Recommended for best results)
1.
Preheat: Place both your main skillet and your smaller "press" skillet over medium to medium-high heat. Allow them to get hot for at least 5-7 minutes.
2.
Prepare Sandwich: While skillets heat, assemble your panini. Lightly brush the exterior of your bread slices with olive oil or softened butter for extra crispness and flavor.
3.
Oil Main Skillet: Add a tablespoon of olive oil or butter to your larger, main skillet.
4.
Careful Oiling of Press Skillet: Using tongs, carefully hold a paper towel dipped in oil and lightly oil the bottom of your preheated smaller skillet. Be very cautious, as it will be hot!
5.
Cook: Place your assembled sandwich into the main skillet. Immediately place the hot, oiled smaller skillet directly on top of the sandwich. Gently press down.
6.
Weight (Optional but Recommended): For even more pressure, place a heat-safe weight (like a filled tea kettle or a heavy pot) on top of the smaller skillet.
7.
Toast: Cook for about 3-5 minutes per side, or until the bread is golden brown and crispy, and the cheese is beautifully melted and gooey. You may need to flip the entire assembly (main skillet, sandwich, top skillet) if you want grill marks on both sides, or simply remove the top skillet, flip the sandwich, replace the top skillet and weight, and cook the other side.
Method B: Single Skillet with Separate Weight
1.
Preheat: Place your main skillet over medium to medium-high heat. Warm your chosen weight (e.g., another pot filled with water) if desired, but it doesn't need to be as hot as a second skillet.
2.
Prepare Sandwich: Assemble your panini, brushing the exterior of the bread with oil or butter.
3.
Oil Skillet: Add a tablespoon of olive oil or butter to your hot skillet.
4.
Cook First Side: Place the sandwich in the skillet. Immediately place your heavy, heat-safe object on top of the sandwich, pressing down firmly. Cook for 3-5 minutes until golden brown.
5.
Flip and Repeat: Carefully remove the weight, flip the panini, and place the weight back on top. Cook for another 3-5 minutes until the second side is golden and the cheese is fully melted.
4. Finish and Serve
Once your panini is golden brown and the cheese is gloriously melted, carefully remove it from the skillet. Transfer to a cutting board, let it rest for a minute (this helps the cheese set slightly), then slice it diagonally. The diagonal cut isn't just for aesthetics; it also makes the sandwich easier to eat. Serve immediately and enjoy! For those busy evenings, learn the
Quick Weeknight Panini: Appliance-Free Skillet & Weight Hack.
Beyond the Basic: Creative Panini Fillings
Once you've mastered the technique, the world of panini is your oyster. Experiment with different flavor combinations to keep things exciting:
*
The Italian Job: Prosciutto, fresh mozzarella, basil pesto, and sun-dried tomatoes.
*
Mediterranean Delight: Roasted red peppers, goat cheese, spinach, and a drizzle of balsamic glaze.
*
Southwest Fiesta: Sliced cooked chicken, pepper jack cheese, avocado, and a touch of chipotle mayo.
*
Breakfast Panini: Scrambled eggs, crispy bacon, and cheddar cheese on brioche.
*
Sweet Treat: Nutella and banana slices on brioche bread, with a sprinkle of cinnamon.
Don't be afraid to mix and match. The key is to balance flavors and textures while ensuring your chosen ingredients can stand up to the heat and pressure.
Conclusion
Making an
easy homemade panini without a panini press is not just possible, it's incredibly simple, satisfying, and a testament to clever kitchen hacks. By utilizing a common skillet and a heavy object, you can achieve that sought-after crunchy exterior and irresistibly gooey interior that defines a perfect panini. This method frees you from the need for specialized gadgets, offering a quick, easy, and cleanup-friendly way to enjoy cafe-quality hot sandwiches right in your own home. So, next time that panini craving hits, don't hesitate. Grab your skillet, gather your favorite ingredients, and prepare to embark on a delicious culinary adventure!